I don't ask for favors often. Well, maybe I do, but this one is for real. I need you to pin this post. I need you to share this with your friends, your mom, your grandma, your teacher at school. I nearly lost my will to live completing this particular task and I don't want my suffering to be in vain. If I can help just one person, if I can keep one person from cursing and crying and shaking their fist at the sky, well then, my job here is done. So please, tell a friend or use this info yourself, whatever. I just don't want this information to go to waste. Here goes.

And just so you know I'm serious about you sharing this, I'm not even going to curse in this post. Even though there was so much cursing in real life.
Oh so much.
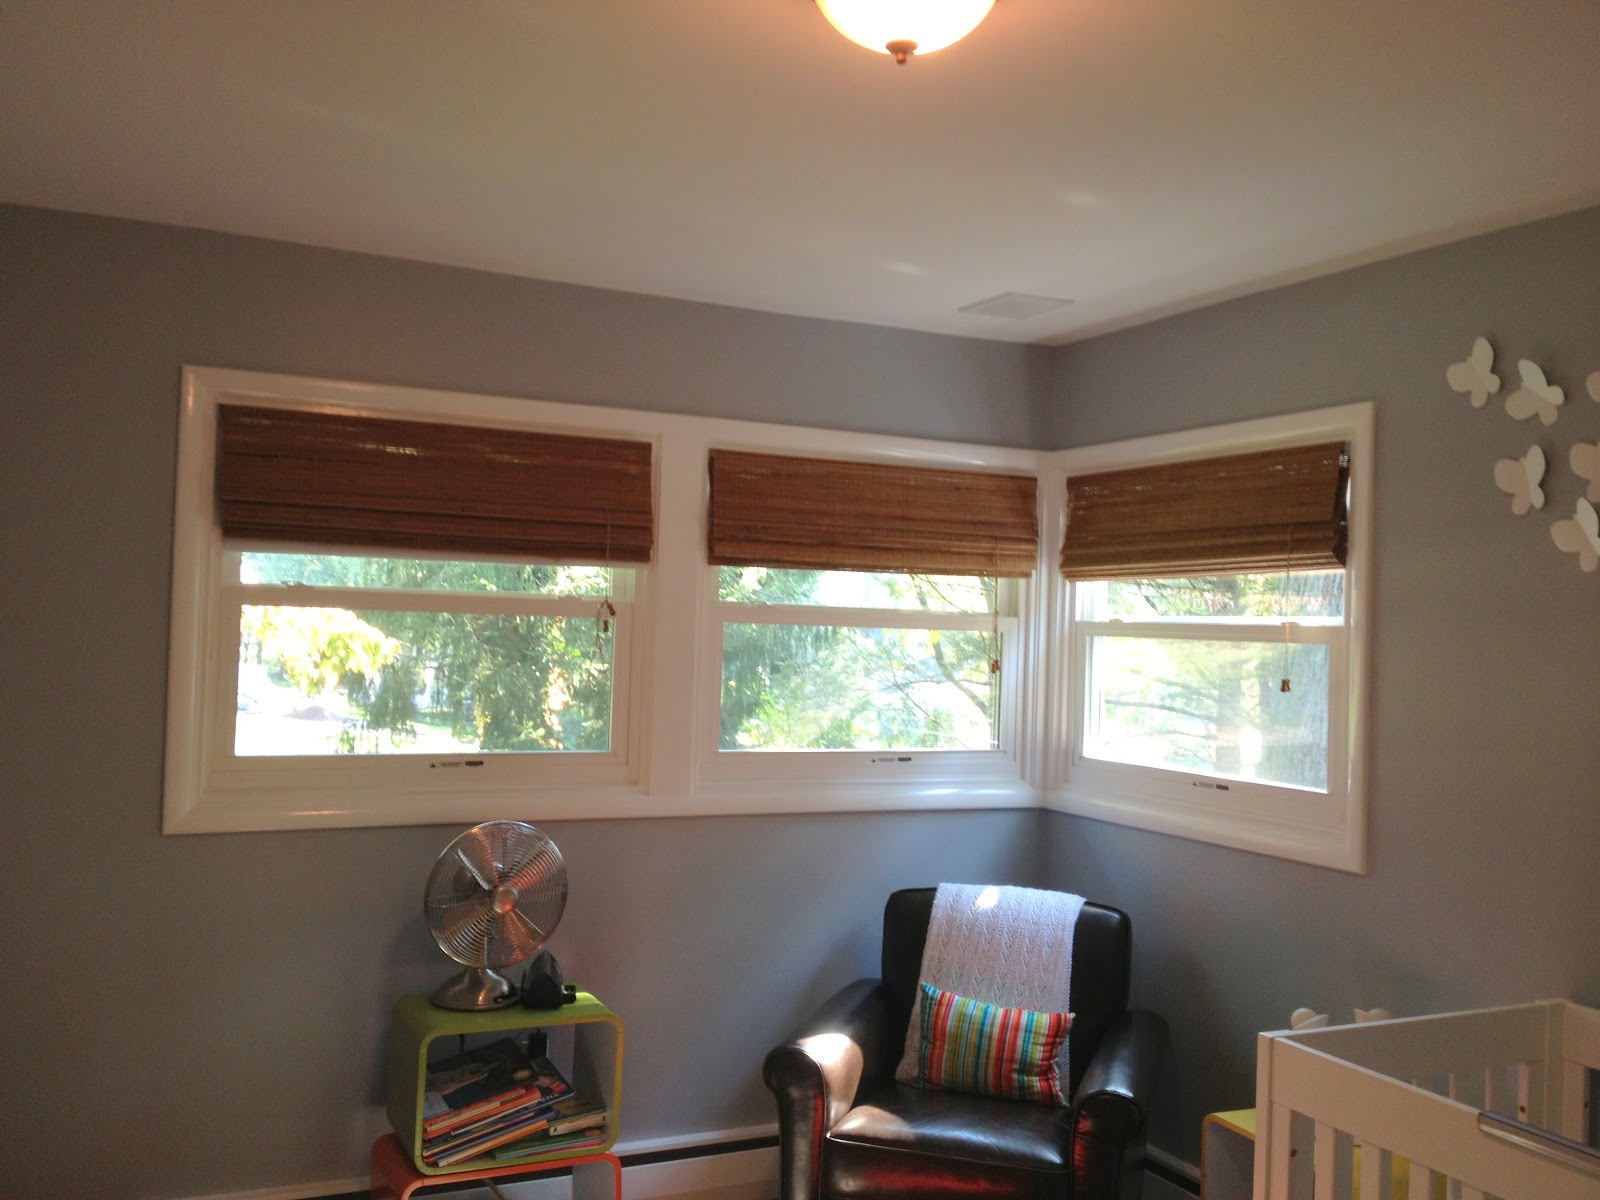
Okay, so here's the deal. We have a ranch house built in the 1960s. Ranch houses very commonly have what I will henceforth refer to as 'weird windows.'

They're gorgeous and huge, but they're horizontal instead of vertical
and they're really close to the ceiling.
I come from the land of 'regular windows.' You know, vertical rectangular windows where you can cut some fabric, hang a rod and call it a window treatment. I was all ready to do the same to these windows, scouring Pinterest and Google for 'corner window treatments' when I ran into the problem that nearly ended it all for me.
We have baseboard heat in this house. That's the white thing along the floor. Instead of central heat with the vents in the ceiling or even old school vents in the floor, we have to have these long heaters along all the floors, TOTALLY jacking up my plan for window treatments.
Because you see, you can't hang curtains anywhere near baseboard heat because of the fire hazard. Even though the heaters don't get hot enough to burn and I've seen people ignore the rule and hang curtains anyway, I didn't want to chance it in my baby's nursery. The furniture is in front of them, a safe distance away, but that didn't solve my curtain dilemma.
They say that IF you did curtains, they'd have to stop 12 inches away from the heater. That's in the middle of the wall and that is NOT the business. So I ditched that idea with a quickness and went straight to Plan B: Bamboo shades.
They look great, give a bit of texture and they're not expensive. I ordered mine from Overstock because they have a billion different kinds with not-easily-found widths and lengths. Plus, they have fast shipping and their customer service is the BOMB. My windows are 41.5 inches and I mistakenly ordered the 40 inch shades instead of the 41 inch ones. When I went to return them, online it said I couldn't. But when I called customer service, not only did they authorize my return, they gave me a $15 credit to use when I ordered the 41 inch shades! How's that for customer service! So buy your shades from Overstock. That's about the only thing I did right.
However, the 41 inch shades were 98 inches long - waaay too long for my 35 inch long windows. So off I went to Google to find a tutorial for shortening bamboo shades.

Found it!
This is a great tutorial, and I don't have much to add to it. But her shades and mine have different hardware so between the two, I'm sure you'll be able to shorten your shades too.

I flipped my shade over and it looked nothing like hers, but it was very straightforward. The loopy things on the left control the accordion motion of the shade. The straight cord makes it go up and down. I measured how long I wanted my shade to be and started to unwind the cords from the keyring holder things.

Once you've decided how short your shade will be, tie a knot at the lower ring and carefully make your cut. If your desired length falls between rings, cut your shade so it's longer.
It's better to be longer.
So far, you haven't cut the shade itself. That's because you have to hot glue it first, otherwise when you cut it, it will promptly unravel and you'll have little bamboo shoots all over your floor. That's the first time I cursed. The tutorial was like 'you may want to glue the leftover part of the shade.' I say you MUST glue it unless you want to stop in the middle of your project to clean up bamboo shoots.

Glue dots above and below the bamboo shoot I'm going to remove.
The tutorial said to glue the front and back of the shade;
I found that gluing just the back was plenty fine.

I used a box cutter to get underneath each little thread to cut it loose and remove the shoot. Once I had it removed, I used scissors to cut the rest of the threads.

I don't know why this picture won't load right, but you can still get the idea.
See how my ring is a good distance from the end of the shade. You want that because you're going to fold up the shade at least a couple of inches to 'hem' it.

So that's how much I folded up to hem the shade. I just ran a line of glue across the shade, folded it up and pressed them together.
This is different from the previous picture because I was learning as I was going.
Good thing I had three shades.
The previous picture didn't have as big a hem and I wish it did because the shade lays better with a bigger hem. Let my mistake make your shades be more awesome.
That's it! Flip your shade over and hang your new, shorter, bamboo shade! A few notes of caution though:
- The pull cord will be crazy long. Make sure the shade is all the way down before you cut the cord. Otherwise you will curse your face off because it took you so ridiculously long to figure out how to shorten the stupid shade, only to cut the cord so short that the dumb thing can't be let down all the way. Then you'll have to go to JoAnn's, cursing the whole way to buy more cord because you have to restring the whole stupid shade because you weren't paying attention.
- Hot glue will burn you. Be careful. I lost feeling in my right pointer finger for a minute because I burned it so badly.
- Now that you know how to do it, it won't take you three days and lots of cursing to do it. Be happy about that.

But you will have your shades!
And no, they're not even on the bottom and I don't care.
Getting this far took me entirely too long, with way too much cursing
and near tears so guess what, that's how they're staying.
Now comes the hard part.
Sofia's room is at the front of the house and when cars drive down our street, it's as bright as the day in there, so I had to line the shades with blackout fabric. For that, I found this tutorial.

She made it look so easy.
It's not, unless you do it right.
This tutorial is very straightforward, but she left out one very significant bit of knowledge. A bit of knowledge that caused me to yet again curse my face off when I realized my mistake. But I'm giving you this bit of knowledge so you won't have to curse your face off and once again, you'll be able to do this right the first time instead of having to hang up and take down your shade at least five times, like I did. You ready for me to drop this knowledge? Okay!
You must stitch your shade at the points where it folds. For my shade, it was at the rings. If you don't, regardless of where you stitch, your lining will droop and you will curse your face off.

Like so.
This was the first shade I stitched and there was oh so much cursing when I pulled it up and the blackout lining drooped from behind.
I learned from my mistake and the second and third shade went off without a hitch.

Again with the horizontal pictures loading vertically.
Blogger is working my nerves tonight.
Anyway, you see the outline of the ring under the blackout fabric? You draw an imaginary line across your shade at the ring and you stitch along that line. You must have a curved upholstery needle to do this; a straight one won't work and you can get a pack of them at JoAnn's for like five bucks. Feel the shade for any of the threads and sew the liner to the shade, being careful to stay clear of the pulleys.
After about a week of trying to get this done during naps that were never long enough, I finally finished. I shortened my shades and lined them with blackout fabric. It's totally worth it because Sofia's room is pitch black now and the shades look great in the daytime. It wasn't easy and I cursed and cried, but it's done. And again, if I can help just one person then it was worth it.
Now I just have to muster the will to finish her curtain. I mean, her faux no sew roman shade/valance. That little project is going just swimmingly. There's not nearly as much cursing, but trying to construct a 95 inch valance is kind of a pain.
Actually, it's a huge pain. A 95 inch pain. I really hope it looks good when I'm done.

It looks so good! I never think to use shades instead of curtains, but I really like it! Good work! And I'm so glad that you lived to tell the tale! :) (side note - totally pinned this!)
ReplyDeleteGirl....your misery cracks me up! Is that a bad thing? :) I've been meaning to line the wicker blinds in my sunroom, but haven't taken the time to figure it out. It's only been 4 years, so it's beyond time. My sunroom is south facing, which means it gets the too-damn-hot Florida sun about 9 months out of the year. Thanks for the tips...and I'm so going to pin this for you, too.
ReplyDeleteTina B
tinab158 at hotmail dot com
Lol, thank you so much! I'm glad to know my efforts may not be in vain!
ReplyDeleteNot at all! It reminds me to do my best to laugh through my pain. :-) And at least now I know how to do it so hopefully the next time won't be so bad. The curtains on the other hand?? :-/
ReplyDeletethe shades turned out great! Good to know you can add blackout liner to them -- I lvoe the look of bamboo shades, but didn't know they can be lined!
ReplyDeleteJust want to say thanks for the tutorial! I just found it on pinterest, so at least one of your readers was listening to you :) Andddd I'm sure it'll save me lots of cursing! But assuredly not *all* cursing, because, well, I'm doing the project and there is almost always a very silly (read: stupid. Like really stupid) mistake made. Haha thanks again :)
ReplyDeleteChoosing window treatments can be a daunting task for any homeowner. Zebrablinds provides a fast and easy way to choose from hundreds of design options that are made to fit any budget. From the simple Roman Shades to automatic Solar Shades, we've got you covered.For better reference http://www.zebrablinds.com
ReplyDeleteIt looks to me that you laid the lining over the rings and cords then stitched around them? You didn't cut little slits and pull the rings through?? If so i can honestly say that I Love You!!!
ReplyDeleteIt looks to me that you laid the lining over the rings and cords then stitched around them? You didn't cut little slits and pull the rings through?? If so i can honestly say that I Love You!!!
ReplyDelete