But now that I have my photos uploaded, let me show you my sewing room! Starting with the (grrrrr) curtains...
I took Julia's advice and screwed in another eye in the center of the two screws on the right side of the cornice. It only took a few seconds and I just sat the wire on top of the screw - there was no way I was going to tempt fate and unwrap the wire and try to thread it through the eye. Droopiness solved!
Nice and straight
But of course it couldn't be that easy on the left side! For the life of me, I have no idea what the deal is with the left side but I could not get a screw in no matter how hard I tried. I was going to take Diva's suggestion and put a push pin on the other side but of course we have no push pins in the house. That reminds me, I need to make a trip to the office supply closet before I leave work today. I MEAN, I need to stop by Office Max and BUY a box of push pins.
Do you see this?
It's mocking me, taunting me, making me sweat and curse!
It's called 'leaving well enough alone' for a reason.
However, I will not be defeated by that dumb cornice. I will find a way to get a screw in that side. After all, Drew got a hook in there once, surely he can do it again right? Right?!
At any rate, the rest of my room transformation went amazingly well and I'm so very pleased with how it all came out - my goal is to sew something this weekend! So let's start with my table, because that's what I'm most excited about! I found it on craigslist for $30 and after confirming the measurements would work in the room, I drove out to Plano to pick it up.
Regular country-looking farm table
Personalized by the little kid of the house
Inspected by the dog of this house
Goo-Gone will not only remove stickers,
it will remove paint and possibly your skin so be careful!
I was going to use my standby, Valspar's Pale Bloom so I wouldn't have to spend money on paint but when I opened the can, I knew there wouldn't be enough for the table. Thankfully, we had lots of other paint on hand so I got busy opening the cans and brainstorming.
I'm the one who uses all the paint, so why is it all on the top shelf?
Better access for the short chick.
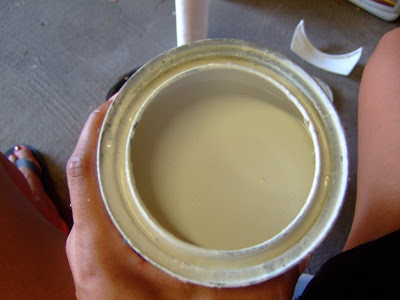
In opening and rearranging, I found a similar paint color that turned out to be the color of the walls in the sunroom (as best as I can tell.) Figuring that would work out nicely, I dumped the rest of my Pale Bloom in my bucket, mixed it with the new color (Sherwin Williams custom - the label was too faded to tell the name), and hoped for the best!
What would you call this? Creamy-ish? Almond-milk-y?
Mixed with the rest of my Pale Bloom
This little spout is the coolest!
99 cents and it snaps onto a pint or a quart
and catches spills!
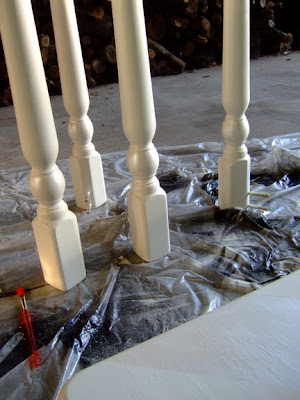
The rest is pretty much the same as any other furniture painting. Sand, prime, paint, poly. I did all that and was very pleased with how my table came out! However, it sat in the garage for a couple of weeks because I wanted to experiment with painting a design on the top and couldn't decide on one. I wanted to do a subtle stencil like Kristin but I didn't trust my free-handing skills. Centsational Girl made her own stencil but that was far too much effort for me.
It's just high-gloss paint over latex in the same color
It's nice and subtle and I love that
I finally settled on stripes - they're super easy and taping off the table took me about five minutes and that's after I figured out that if you work from the outside in, your lines will be straighter.
I didn't use a measure or level because I was too impatient.
I just eyeballed, taped, pulled up the tape because it was crooked
and taped again.
Applying the glaze as the sun started to set.
It's Valspar's Brushed Pearl and it's in a blue and bronze can.
It's Valspar's Brushed Pearl and it's in a blue and bronze can.
Finished. Whenever using tape, take it off the second you're done painting.
If you let it dry, your paint stripes will come off with it and the edges will be uneven.
I threw some glaze on the knobs of the legs to bring it all together
In her new home in the sunroom!
I know it looks like the stripe doesn't go to the edge of the table, but I promise it does.
From some angles you can see the glaze very clearly
All ready for me to create!
Can I tell you how sad I am that my sewing machine has a black power cord?
Next up: how I lost my mind at Target.


This room is so beautiful! It makes me want to pull out the sewing machine my darling mama bought me for xmas in 2002 (I still haven't opened the box)!
ReplyDeleteI love it! You are so awesome!
ReplyDeleteI have been delinquent in thanking you for the shout-out to my blog the other day. Thank you!
I have a habit of checking blogs on my smart phone, which is so smart that it makes it really really hard to comment on blogs, so it means that I sometimes can't post comments even when I really, really want to. Thank you for forgiving me! (I'm assuming.. :))
okay so now I want to go out and find a table and paint it!...::adding it to my list:: very nice!
ReplyDeleteGood Lord - you make me want to go refurbish a sewing table or something. That looks AWESOME Desiree! I'm also the painter in the house, though I'm just learning. I love how much a coat of paint can change the look of things though. Your sewing area looks gorgeous!
ReplyDeleteThe room is beautiful Desiree! Good job! I can't wait to see what kind of "creations" you make in that room! Lovely indeed...
ReplyDeleteYour idea was even better than mine! I would have never thought of just resting it on top of the middle screw, and I would have driven myself crazy unstringing and stringing the curtains again!
ReplyDeleteThe curtains/tables/room look great, by the way! I love the soft light through the gauzy curtains, it makes the room so ethereal!
What a nice zen place to become Vera Wang!
So proud of you. It looks great! I'm telling you....interior design has got to be your calling.
ReplyDeleteHey-
ReplyDeleteSo since you've busted out the sewing machine I've got a quick and easy way for you to disquise the black cord.
Measure it length wise and find some fabric you like. Fold said fabric in half the long way, pin and let sew. (Make sure it's about twice the length of the cord, or it looks funny.) Then flip it inside out and pull it over the cord. I used a little ribbon at the top to keep it in place. (Just tied it around the pocket of fabric and cord base.)
Then just let it go. And you've got a pretty cord cover (also works well for hiding ugly but cheap chain to hang heavy things.)
Wow, you did a splendid job, I love it!!!
ReplyDeleteHey-
ReplyDeleteSo since you've busted out the sewing machine I've got a quick and easy way for you to disquise the black cord.
Measure it length wise and find some fabric you like. Fold said fabric in half the long way, pin and let sew. (Make sure it's about twice the length of the cord, or it looks funny.) Then flip it inside out and pull it over the cord. I used a little ribbon at the top to keep it in place. (Just tied it around the pocket of fabric and cord base.)
Then just let it go. And you've got a pretty cord cover (also works well for hiding ugly but cheap chain to hang heavy things.)
I love it! You are so awesome!
ReplyDeleteI have been delinquent in thanking you for the shout-out to my blog the other day. Thank you!
I have a habit of checking blogs on my smart phone, which is so smart that it makes it really really hard to comment on blogs, so it means that I sometimes can't post comments even when I really, really want to. Thank you for forgiving me! (I'm assuming.. :))